
[fusion_builder_container hundred_percent=”no” equal_height_columns=”no” menu_anchor=”” hide_on_mobile=”small-visibility,medium-visibility,large-visibility” class=”” id=”” background_color=”” background_image=”” background_position=”center center” background_repeat=”no-repeat” fade=”no” background_parallax=”none” parallax_speed=”0.3″ video_mp4=”” video_webm=”” video_ogv=”” video_url=”” video_aspect_ratio=”16:9″ video_loop=”yes” video_mute=”yes” overlay_color=”” video_preview_image=”” border_size=”” border_color=”” border_style=”solid” padding_top=”” padding_bottom=”” padding_left=”” padding_right=””][fusion_builder_row][fusion_builder_column type=”1_1″ layout=”1_1″ background_position=”left top” background_color=”” border_size=”” border_color=”” border_style=”solid” border_position=”all” spacing=”yes” background_image=”” background_repeat=”no-repeat” padding_top=”” padding_right=”” padding_bottom=”” padding_left=”” margin_top=”0px” margin_bottom=”0px” class=”” id=”” animation_type=”” animation_speed=”0.3″ animation_direction=”left” hide_on_mobile=”small-visibility,medium-visibility,large-visibility” center_content=”no” last=”no” min_height=”” hover_type=”none” link=””][fusion_text columns=”” column_min_width=”” column_spacing=”” rule_style=”default” rule_size=”” rule_color=”” class=”” id=””]AODA compliance means ensuring your site is accessible and usable by everyone, including people with disabilities, in line with Ontario’s latest regulations and standards.
The Accessibility for Ontarians with Disabilities Act (AODA) is a directive to site owners aimed to help make all websites accessible to people with various handicaps.
Unfortunately, when building a website, accessibility is overlooked way too often. And with the compliance deadline closing in, it’s critical to make sure your website is accessible and AODA compliant.
Read on to learn everything about AODA and how to make your site compliant and accessible.
Table of Contents
What is AODA
AODA website compliance requires all public and (large) private organizations to make their websites and web content conform with mandatory accessibility standards (WCAG 2.0).
The AODA stands for the Accessibility for Ontarians with Disabilities Act, which is a law that came into effect in 2005 aimed to ensure people with disabilities get equal access to all goods, services, facilities, accommodation, employment, buildings, structures, and premises.
The web accessibility under AODA means that everyone, including people with various impairments, is able to access and use the web. The act aims to protect the civil rights of those with disabilities from discrimination.
This inclusivity helps people with various difficulties get fair access to all necessities of modern society, but it also helps you reach more people with your website.
People with disabilities have an estimated spending power of about $25 billion annually across Canada. With better website accessibility you can also reach:
- the elderly
- people with “temporary disabilities” (i.e. broken limbs)
- users with a slow connection
- people using small screen devices
- users with “situational limitations” (i.e. those accessing a website in a bright location or in an environment where they cannot listen to audio)
Additionally, better accessibility is good for SEO. Google and other search engines reward accessible websites as an incentive for every site owner to increase their accessibility.
It’s a win-win situation for you and everybody else.
Who must comply with AODA
The AODA standards apply to all government, non-profits and large businesses in the Ontario province. You must comply with AODA standards for websites if you are:
- A private business with 50+ employees
- A large non-profit organization (50+ employees)
- A public sector organization
As of January 1, 2014, all organizations in Ontario with 50+ employees that create a new website and web content have to adhere to AODA web standards. The AODA act applies to you:
- If you have a site with a new domain name
- If your existing site undergoes a significant refresh (i.e.changing your site’s look and feel, changes to site navigation, or updating and changing most of your site content)
- When you add new content to your website

AODA compliance deadline
AODA private sector compliance requires all organizations to make their websites and content accessible according to the following timeline:
- January 1, 2014 – All new websites, significantly refreshed websites and any web content posted after January 1, 2012, must meet Web Content Accessibility Guidelines (WCAG) 2.0 Level A
- January 1, 2021 – All websites and web content posted after January 1, 2012, must meet WCAG 2.0 Level AA (excluding live captioning and audio description)
Failing to comply with AODA can result in hefty fines. The maximum penalties under AODA are:
- Corporations/organizations can be fined up to $100,000 per day
- Directors and officers of a corporation/organization can be fined up to $50,000 per day
The AODA compliance deadline is fast approaching, so it’s about time to optimize your site for accessibility in order to avoid severe penalties and make the world a better place for you and everyone else.
To ensure you meet AODA deadlines, consider hiring a professional web development team from Toronto to improve your website’s accessibility fast.
WCAG accessibility standards
AODA uses WCAG 2.0 as mandatory accessibility standards all websites in Ontario must comply with.
WCAG stands for Web Content Accessibility Guidelines which is an internationally accepted standard for web accessibility developed by the World Wide Web Consortium (W3C).
WCAG 2.0 is organized around 4 principles (POUR) which lay the foundation for web accessibility. Anyone who wants to use the web must have content that is:
- Perceivable – Information and user interface components must be presentable to users in ways they can perceive
- Operable – User interface components and navigation must be operable
- Understandable – Information and the operation of user interface must be understandable
- Robust – Content must be robust enough that it can be interpreted reliably by a wide variety of user agents, including assistive technologies
WCAG consist of 12 guidelines in total that address their respective POUR principles.
Each WCAG guideline has three levels of conformance: A, AA, and AAA.
If you have a newly created or refreshed website, you must meet level A (as of 2014). By 2021 your website will need to conform to level AA while meeting level AAA is not required at this time.
In 2018, W3C announced a revised version of accessibility standards dubbed WCAG 2.1. This revision expands on the 2.0 version adding three more success criteria intended to help users with:
- disabilities on mobile devices
- cognitive or learning disabilities
- low vision
It’s important to note that you’re only required to comply with WCAG 2.0. Still, it’s always a good idea to make a bit of extra effort and improve your accessibility in line with the latest standards.
How to make your WordPress site AODA compliant
Now that you know everything you need about AODA compliance let me show you how to make your business website more accessible and win the required AA level of WCAG 2.0 standards.
Even if you’re not running a large business website, it’s worth improving your accessibility because of the added SEO benefits, reaching a bigger audience, as well as making the world a better place.
1. Check your current accessibility
Before you do anything else, the first step is to check your current accessibility. That is, provided you already have a website. If not, you can return to this step once your business website is developed.
Older websites, built before the AODA enactment rarely meet all WCAG criteria. This is sort of understandable since back then there wasn’t enough awareness, and most websites weren’t built with accessibility in mind.
But, even if you’re pretty confident that your site is up to par with the latest design standards, it’s still worth checking – you might be in for quite a surprise.
While there are many free accessibility checkers online, I recommend Wave because of its comprehensive visual reports.
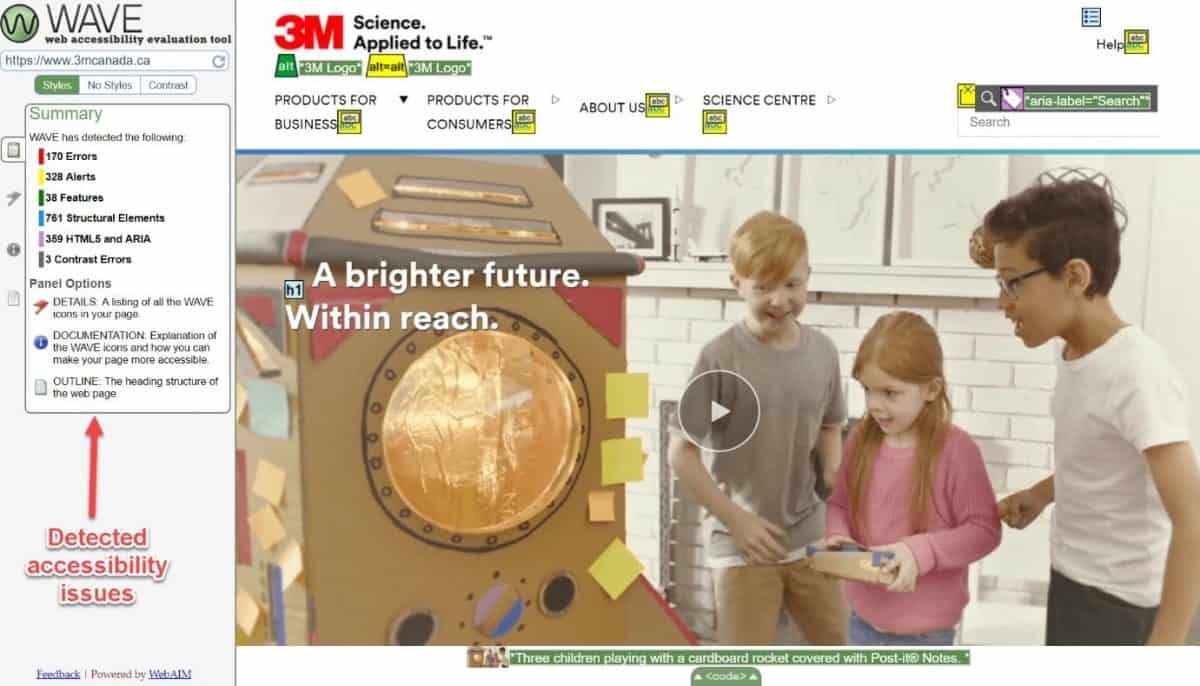
As you can see, even a giant like 3M isn’t immune to accessibility errors. That’s something they’ll need to address before the AODA compliance deadline.
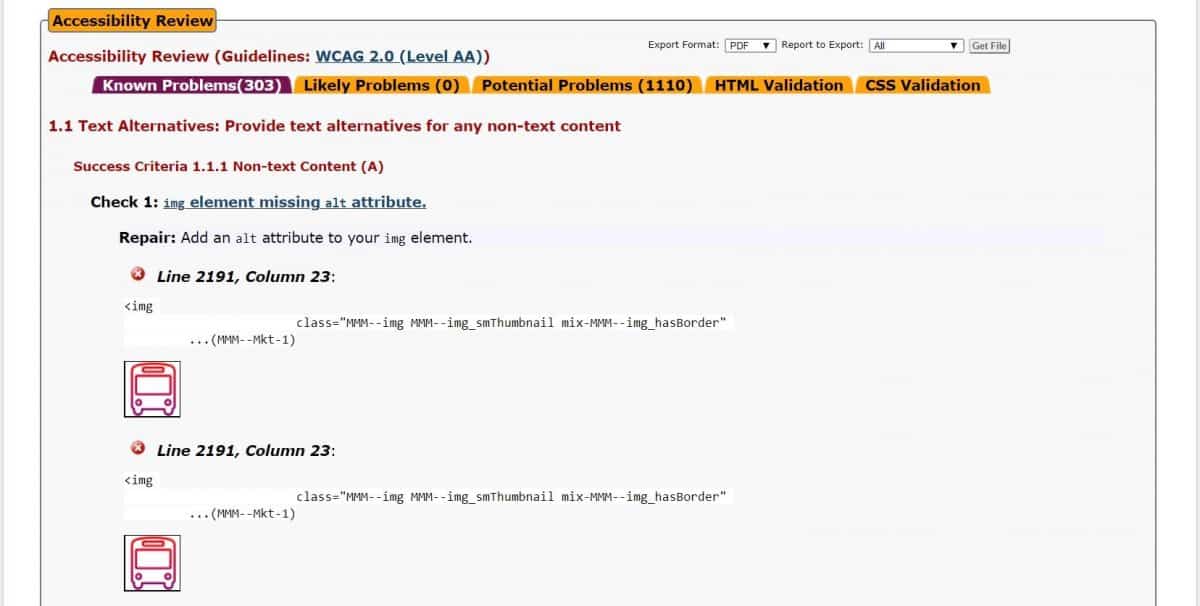
Alternately, you can use AChecker to audit your website for a full accessibility review according to WCAG 2.0 guidelines. This tool is more developer-friendly since it identifies the exact lines of code with errors along with repair recommendations.
Once you assess your site accessibility, you need to take action and eliminate any potential errors to meet the WCAG AA standard.
2. Use an accessible-ready WP theme
If you don’t have a site yet, a good place to start building an accessible website is installing an accessible-ready WordPress theme.
Not all WordPress themes are developed in line with WCAG standards. You should look for themes with an accessibility-ready tag which means that the theme includes proper use of media, controls, forms, heading structure, use of colour, skip links and ARIA roles.
Some notable accessibility-ready themes are:
- Avada
- Apex
- Twenty Nineteen
- Storefront
- Javelin

Getting an accessibility-ready theme is a good place to start, especially if you don’t have a website or want to get a fresh new look that complies with WCAG 2.0.
However, it’s not an option for everyone. It may not be suitable if you already have a site and don’t want to switch to a new theme. Not to worry though, even if you don’t want to replace your existing theme, you can still optimize your site for accessibility.
The following 15 steps will help you make your site accessible and meet the AODA criteria.
3. Have clear typography
Improving your accessibility doesn’t have to be a lot of work, sometimes small tweaks can go a long way. Additionally, they can improve the user experience for everyone, not just people with disabilities.
That is the case with typography. As cool as fancy fonts can be, oftentimes they are pretty hard to read, especially to people with visual impairments.

For best legibility and accessibility make sure to use a clean typeface (font). Although serif fonts are ok with today’s high-resolution screens, avoid any strangely shaped font such as those that look like handwriting.
AODA doesn’t have a strict requirement for font size; however, the recommended size for body text is 16px, while the minimum size should be 12px. Tiny text (10px and below)is too small and not accessible, therefore should be avoided.
Also, avoid having text that’s embedded in a graphic or image. This can often be very hard to read for people with low vision, those with visual tracking problems and those with cognitive disabilities.
If, for whatever reason, you must use pictures of text, make sure the font size is especially large and that you use high-contrast colours.
For an extra bit of accessibility, allow users to change the text size.

Specify font sizes in relative units such as percentages, for easier resizing and scaling.
The example website from above also allows users to switch the colour contrast, which is the next item on our list.
4. Use contrast for visually impaired
Having high contrast is a critical accessibility component for people with colour blindness. People with colour vision deficits struggle to distinguish text and content that doesn’t have enough contrast.
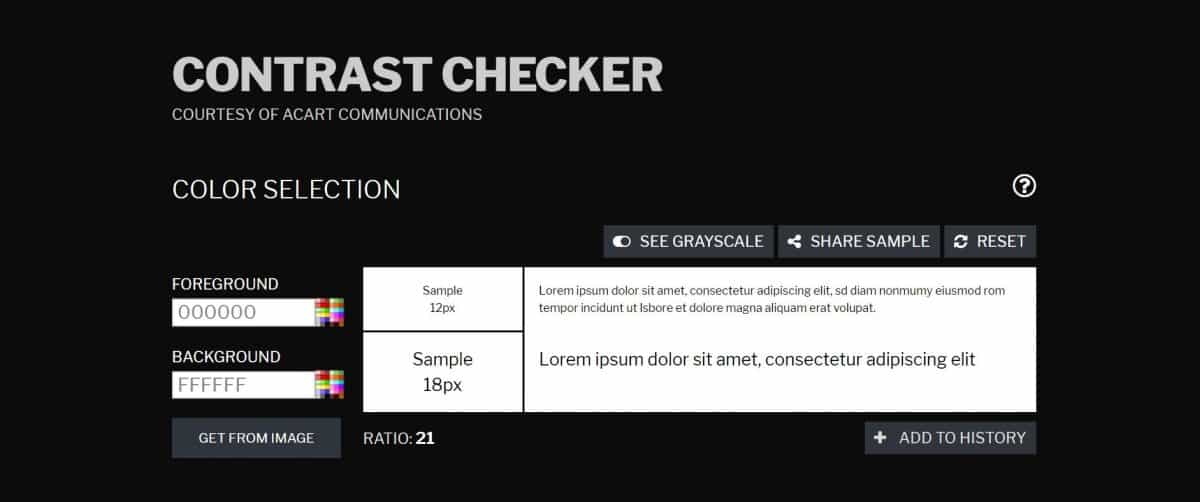
AODA contrast requirements for WCAG AA are that any text or images of text have a contrast ratio of 4.5:1. This means either using:
- Dark text on a light background, or
- Light text on a dark background
You can use the Contrast Checker tool to verify the colour scheme for your site.
There are a few exceptions to the AODA colour contrast rule, provided that the text is:
- Large text – At least 18 points or 14 points bold with a contrast of at least 3:1
- Purely decorative
- An incidental part of an image – for example, a woman reading a magazine that has text on the cover
- Part of a logo or brand name – there is no minimum contrast requirement
Additionally, you can enable users to swap the colours for more contrast.

With a contrast toggle, users can easily switch to a high contrast interface (by inverting the colours) to access and read the content on your site.
5. Make sure all images have Alt text
Alt text improves accessibility for people who can’t see images, including users who use screen readers or have slow connections.
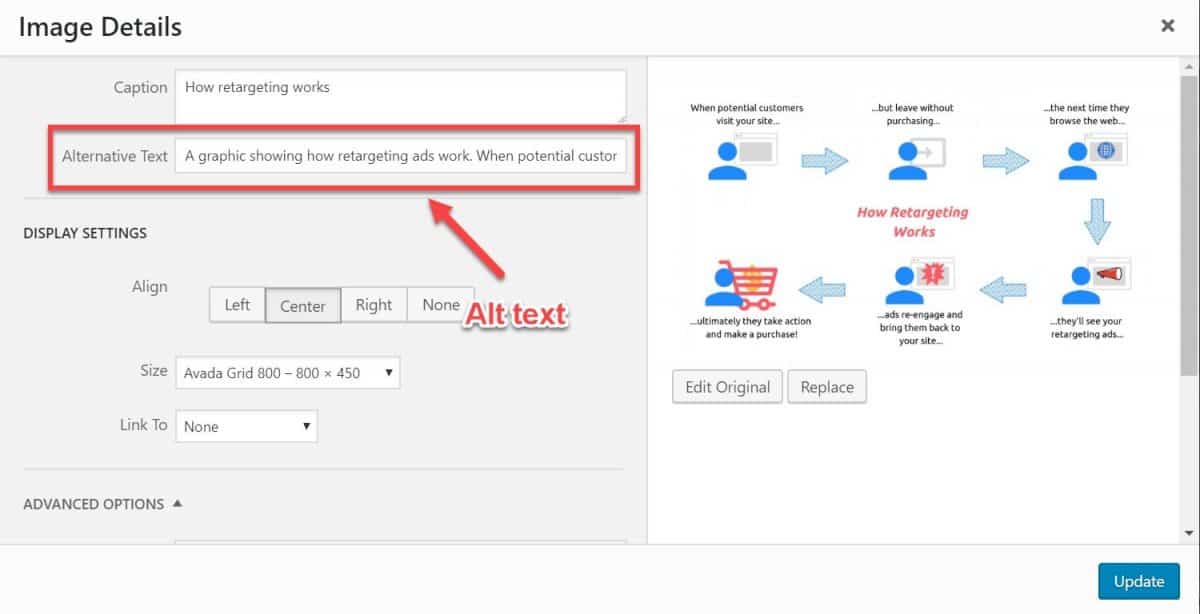
Alt text is a text alternative to images, and it’s supposed to describe what the image is about. It’s used by screen readers since they can’t understand the meaning of images in your content.
Google also uses alt text to understand what your images are about, which makes it important for SEO. Properly optimizing your images around your target keyword can increase the relevancy of your content and can give you a significant ranking boost.
All images on your site should have an optimized alt text. In WordPress adding alt text is pretty straightforward. Just open the image details window and write a short description, and make sure to include your target keywords.
Be sure to write your alt text with natural language, without keyword stuffing. It’s going to make more sense to users, plus it’s a good SEO practice.
6. Enable keyboard navigation
Some disabilities prevent people from using a computer mouse, and for them, the only option is to use the keyboard. In many cases, disabled people rely on a couple of keys to navigate your site (i.e. TAB key to move forward, and SHIFT+TAB to move back).
To be AODA compliant, you need to enable keyboard navigation on your site. This means people can use a keyboard or a keyboard emulator to navigate your site. Keyboard emulators include speech input software, sip-and-puff software, on-screen keyboards, scanning software and a variety of assistive technologies and alternate keyboards.
A common accessibility issue is that the top-level menu is accessible by the keyboard; however, the submenus are not.
Test your site navigation using the following keys:
- Tab – Navigates to links and form fields.
- Shift + Tab – Move backwards.
- Enter – Activates links and buttons.
- Spacebar – Activates checkboxes and buttons.
- Arrow keys – Selects radio buttons, select-menu options, sliders, tab panels, autocomplete, tree menus, etc.

Lastly, tab through your pages to confirm the following elements are navigable with the keyboard:
- Links
- Menus and dropdown submenus
- Form fields
- Buttons and other controls
Use HTML controls to enable keyboard navigation on your site, such as
7. Optimize contact forms
Forms are at the heart of every website’s conversion strategy. But optimizing your form fields is also a quintessential criterion to meet AODA web standards.
When optimizing forms for accessibility, your goal is to place clear instructions or labels that identify the controls in a form so that users know what input data is expected. In other words, make your form fields clear, visible and accessible to everyone (including screen reader users).
Use the following 4 steps to make your forms accessible and WCAG AA, compliant:
- Add clear labels to each form field (make them visible to screen readers)
- Use placeholder text to help users fill in the form (use it in conjunctions with labels, don’t repeat them)
- Clearly mark required fields
- Use colour and visual cues to make confirmation and error messages perceivable to everyone (including colour blind)

Optimizing forms doesn’t mean cluttering your page with text but providing cues and instructions people with disabilities can follow. It won’t just make your forms accessible, but also make them more usable for everyone.
8. Properly use colours to improve accessibility
Colour is a very important design asset which can enhance aesthetics, usability as well as accessibility of your website. Unfortunately, there’s a big caveat; some users have a difficulty perceiving colour.
To conform with WCAG 2.0 standards, you need to use colour in a proper way. This means colour mustn’t be the only visual means of conveying information, indicating an action, prompting a response, or distinguishing visual elements on your site.
Colour is still a very important visual cue that can improve accessibility; however, be sure to offer alternate indicators for people with impaired vision.
Here are a few examples of proper use of colour in line with AODA standards:
- Using both colour and text to indicate required form fields
- Distinguishing links with both colour and underlining
- Disabled form elements are grayed out and made inactive for screen readers
Lastly, make sure to have enough colour contrast. Avoid those rainbow colour designs from the ‘90s.

9. Avoid auto-play media
Auto-playing media can make your site very inaccessible, especially to those with cognitive, hearing or physical disabilities. This type of content can also interfere with screen readers if the media contains audio.
Since people with disabilities need more time to react you must provide controls to start, pause, stop, restart or hide the content.
Make sure to avoid any auto-playing media such as:
- Videos
- Audio
- Sliders
- Animations
- Carousels, etc.

Also, provide alternatives to any time-sensitive content such as quizzes or tests, so people with various handicaps have enough time to react.
10. Provide textual alternatives to media content
One of the key AODA requirements is to have a textual alternative to all non-text content.
Multimedia such as videos, podcasts and audio files are highly engaging content formats that can significantly enhance the user experience, and you should definitely include them on your website. However, people with visual and hearing disabilities won’t be able to enjoy them unless you provide alternatives.
To meet WCAG standards make sure to include alternatives such as:
- subtitles
- captions
- transcripts
- audio descriptions for videos
- textual descriptions
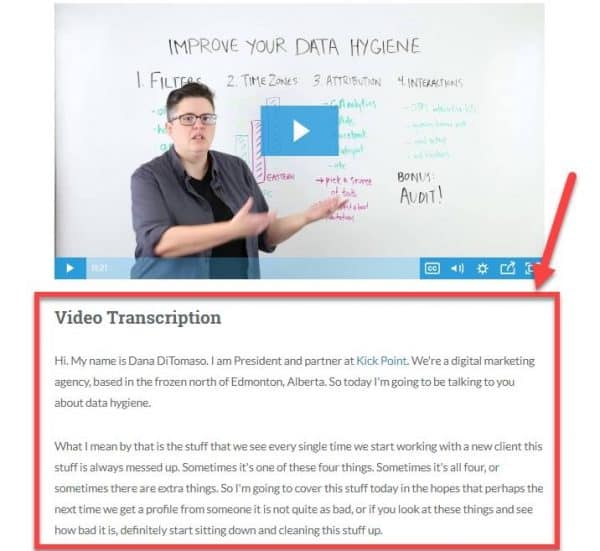
Including video transcriptions on your site will also give you an SEO boost, since search engines can’t understand videos without some sort of textual input.
This requirement is not only limited to multimedia; you must include textual alternatives for:
- Controls
- Time-based media (i.e. animation)
- CAPTCHA
- Tests and exercises
11. Avoid content that flashes
Flashing content goes against AODA accessibility standards as it’s known to trigger seizures due to photosensitivity.
WCAG guidelines recommend avoiding anything that flashes three or more times a second to protect people with photosensitive seizure disorders.
Use Photosensitivity Epilepsy Analysis Tool (PEAT) to analyze your web content and identify any seizure risks.
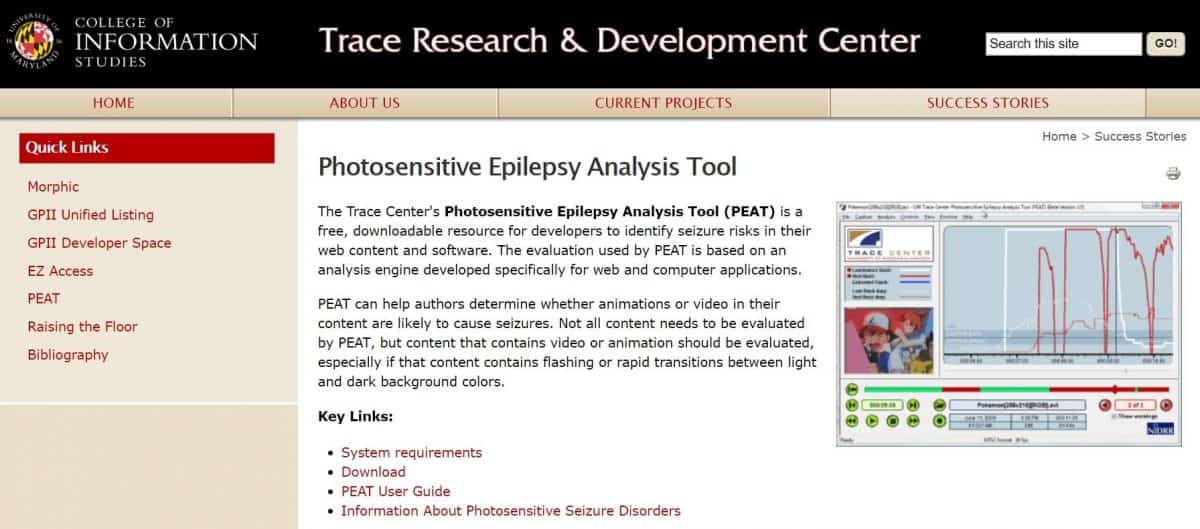
If for some reason, you must include flashing content on your site, make sure that it doesn’t flash more than 3 times a second and keep the flashing area small enough (less than 25% of 10 degrees of the visual field).
12. Improve your content readability
People read content on the internet differently then they do in the physical world, so improving your content readability helps not only people with disabilities but everyone who visits your site.
Users with cognitive, reading or learning disabilities may find it difficult to read your content if it’s written in the form of huge blocks of text.

Make sure your content is scannable, so users can easily peruse your content by:
- Using clear and simple language appropriate for the content
- Writing short sentences and paragraphs
- Including bullet points and numbered lists
- Using images, illustrations, video, audio, or symbols to clarify the meaning
- Providing practical examples to clarify content
- Including internal links to other pages
- Avoiding large chunks of italic text
- Avoiding text that stretches to both left and right margins
Optimizing your content for readability will help meet AODA accessibility standards, but also provide a good user experience to all your visitors.
13. Optimize your heading tags
Optimizing your headings is another way to improve the accessibility and readability of your web pages. A good heading structure will help screen reader users navigate to specific sections of your page.
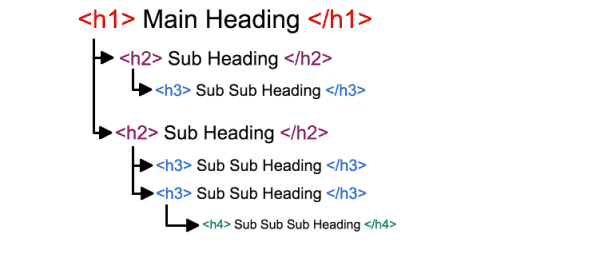
Use headings to give your content structure and hierarchy:
- Include heading tags (to correctly to logically organize your page structure)
- Use h1 as your page/post title
- Have only one h1 tag
- Use h2 and h3 sequentially—treat an h3 as a sub-heading of the h2 that came before
- Don’t skip levels
A logically organized heading structure will help people using screen readers to follow and understand your content. Use it to divide content into scannable blocks; helping you improve your site’s accessibility in line with AODA.
Your headings also play a huge role in SEO. Headings are the index of your content. This way search engines and screen readers understand the structure and meaning of the content better.
Content with a good heading structure ranks better on search engines. Optimizing your h1, h2, h3, etc. around your target keywords will signal more relevancy and give you a boost in rankings.
14. Allow users to skip to main content
Many websites have the main content in the middle of the page, surrounded by many blocks and sidebars for menus, ads, search, etc. People with disabilities (who can’t use a mouse) need a way to bypass all these blocks and skip directly to the main content.
To meet AODA requirements, you must “skip links” to your page for people to get to the content directly, without having to tab through numerous links.
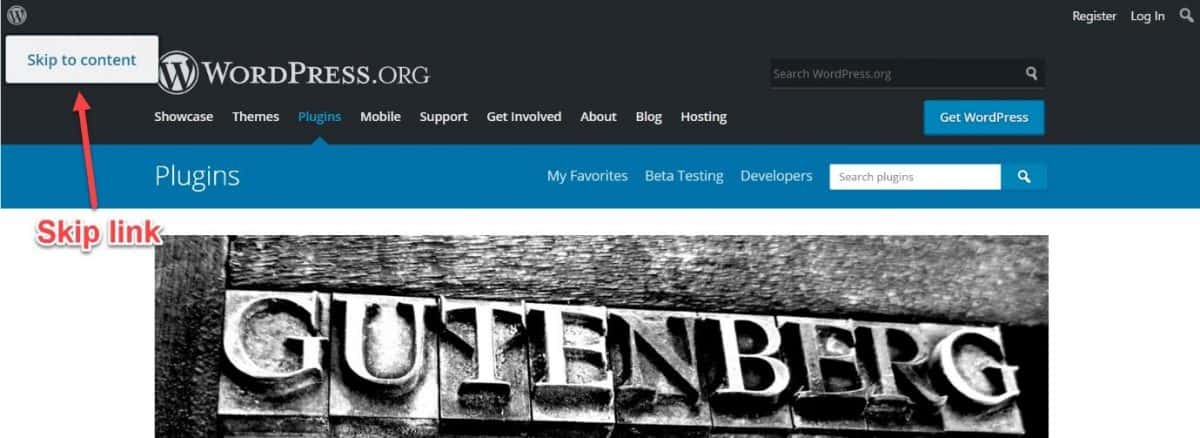
Skip links are essential to the accessibility of your site. Without it, a keyboard user needs to tab through tens of links to reach the main story; the screen reader user has to listen to hundreds of words, and the screen magnifier user must search around for the main content.
You can make skip links invisible using CSS. They will be readable by screen readers and visible when users press the TAB key.
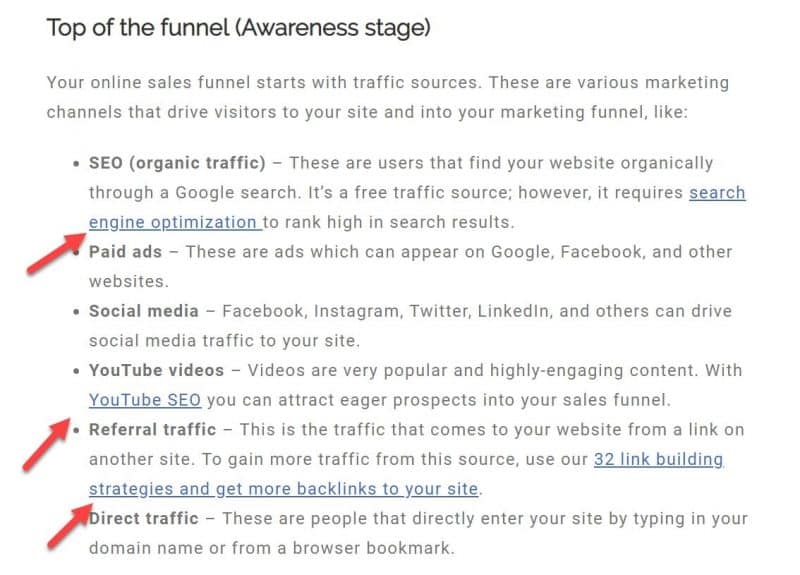
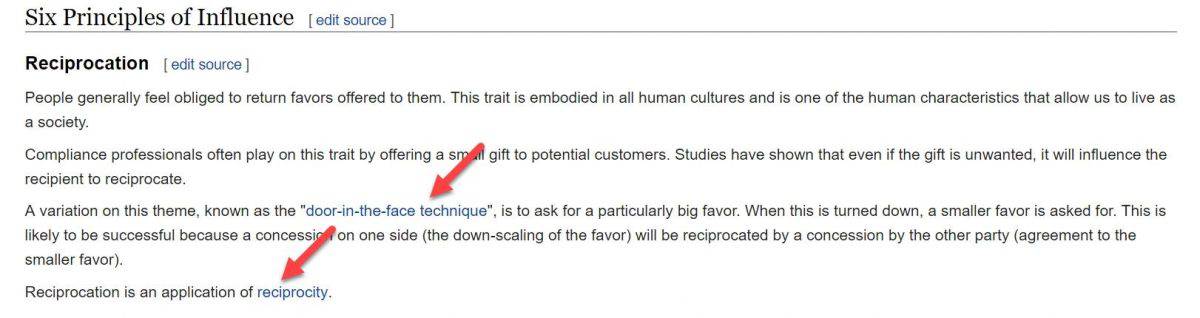
15. Use contextual link anchor text
To comply with AODA and WCAG 2.0, you must make links accessible by having a descriptive and relevant link (anchor) text. Use meaningful link text to describe the resource; avoid anchor text such as “click here,” “read more” or “more info.”
Screen readers can provide users with a list of links that are on your page. Link text that is as meaningful as possible will help users who want to choose which links they want to follow.
The link anchor text should provide context to interpret the purpose of the link.
Some best practices when it comes to contextual link anchor text include:
- Placing descriptive keywords in the anchor text
- Including the exact title of the resource
- Call to action (subscribe to our newsletter)
Having contextual anchor text is not only great for your accessibility but also provides meaning to people without any disabilities and is a good SEO practice.
16. Improve readability with parsing
Parsing is another mandatory accessibility criterion set in the WCAG and AODA standards. The goal is to ensure that user agents (such as screen readers), can accurately interpret and parse content.
If the content cannot be parsed into a data structure, then different user agents may present it differently or be completely unable to parse it.
To facilitate parsing, make sure:
- Pages have complete start and end tags
- Elements are nested according to their specifications
- Elements do not contain duplicate attributes
- All IDs are unique
Ensuring your pages have complete start and end tags and are nested according to the specification will ensure that assistive technologies can parse your content accurately and without crashing.
In plain terms, it’s going to make your pages accessible and AODA compliant.
17. Specify page language with HTML
Specifying default language of a page or part of content can help user agents correctly present content written in multiple languages. This makes it possible to present content according to the presentation and pronunciation rules for the set language.
By specifying your default languages, screen readers can load the correct pronunciation rules, visual browsers can display characters and scripts correctly media players can show captions correctly. As a result, users with disabilities will be better able to understand the content.
This is another WCAG requirement you need to meet in order to make your website accessible and AODA compliant. Be sure to:
- Specify the overall language for your page
- Declare metadata about the language(s) of the intended audience
- Indicate the language of a link destination
- Specify the language for individual words, phrases or passages in your content
You can use W3C’s guide to learn how to set the default language of your site.
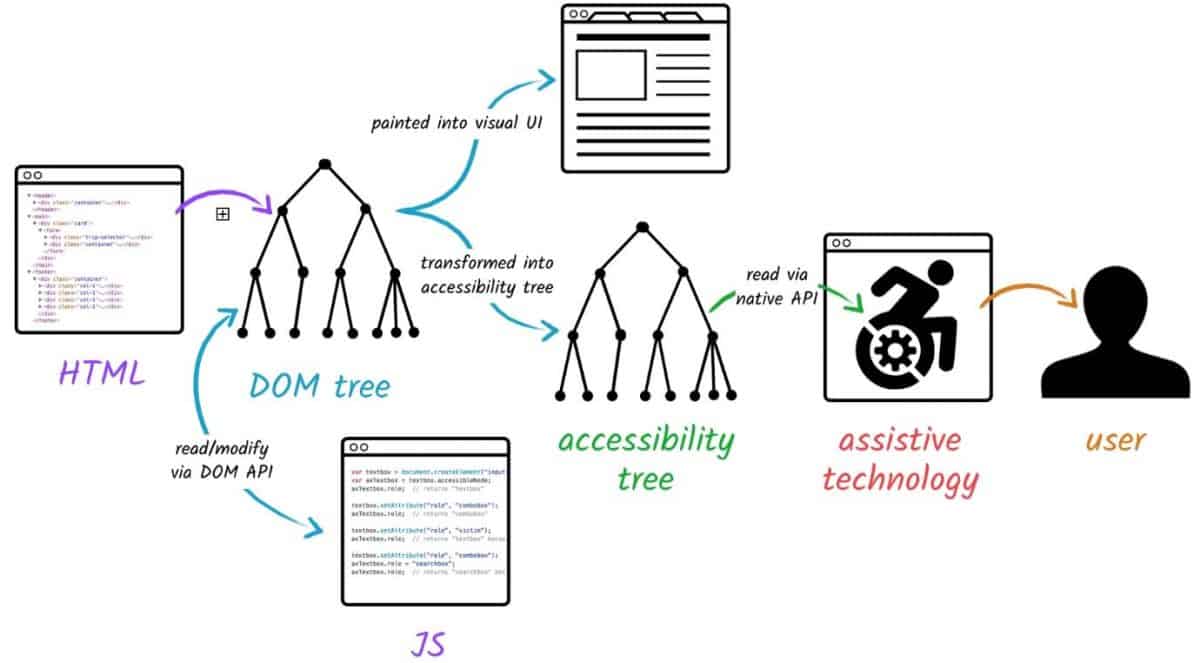
18. Use ARIA landmarks
Include ARIA landmarks to identify different regions of a page. ARIA landmarks tell assistive technologies what it’s reading, where the visitor is on the page, and what to do next.
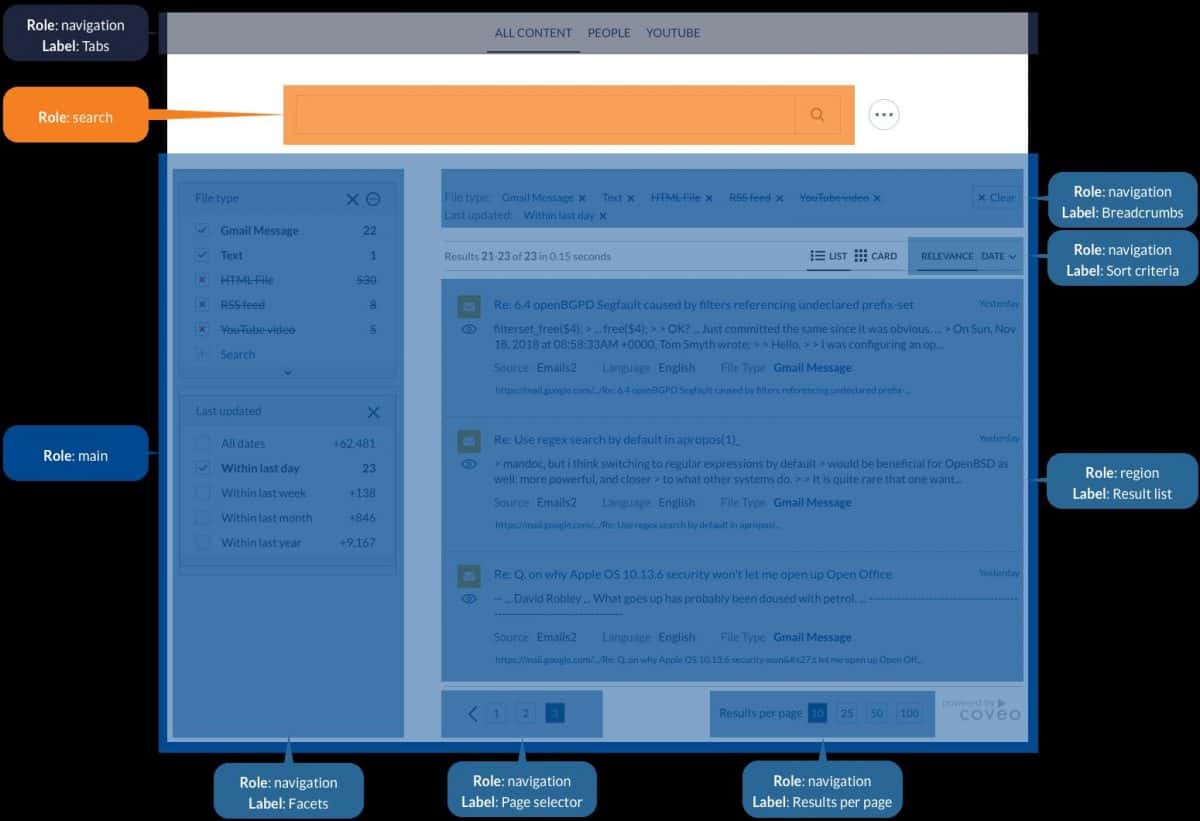
ARIA stands for Accessible Rich Internet Applications, and “is a set of attributes to help enhance the semantics of a web site or web application to help assistive technologies, such as screen readers for the blind, make sense of certain things that are not native to HTML.”
You can use W3C’s guide for more details on how to use ARIA landmarks in line with WCAG 2.0.
Conclusion
Creating an AODA compliant and fully accessible website probably seems daunting at first glance. After all, with such a long checklist of steps launching an accessible site might look like a real chore.
And with the compliance deadline closing in, the pressure is on.
But having a website that’s accessible is a step in the right direction towards a fair and discrimination-free. With AODA, people with various disabilities will get equal access to all necessities of modern society.
Besides the altruistic and legislative reasons, increasing accessibility of your site can also help you reach more people and provide a great UX.
And if all this optimization is simply too much for you to handle, you can always reach out to a team of professional WordPress developers to optimize your site in line with WCAG 2.0 guidelines and make your site AA level compliant.
[/fusion_text][/fusion_builder_column][/fusion_builder_row][/fusion_builder_container]
